UnrealScript has many small useful features that are often overlooked. InterpCurves are one of those small features.
InterpCurves are programmatic curves that can be evaluated. You pass a curve an inputvalue, and it will return an output value. Curves are really useful for evaluating things that would otherwise be done programmatically, and are used in UDK for things such as RPM for vehicles. These curves are also used in the visual curve editor in tools such as Cascade. Curves are a good tool to create a more natural feel to features, as they can be modeled to algorithms, support easing in/out and smooth transitions.

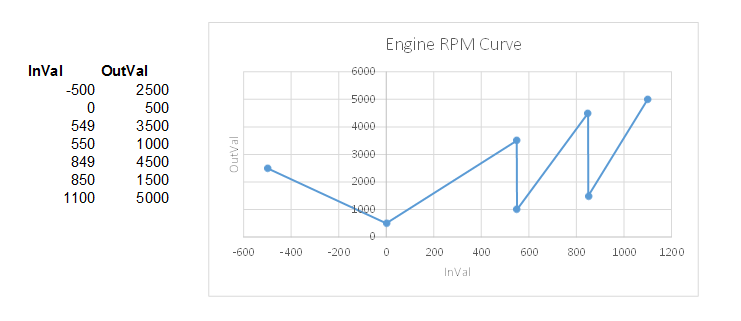
In the RPM graph, you can see the Input Value on the X axis, and the value it resolves to on the Y axis. Each of the drops indicate a change in gear in a vehicle class. The output value is used to update a Continuout Modulator for audio.
InterpCurves can be used for everything from defining RPM for vehicles, to transitions for UI elements (for instance fading in and out, or animation) or gameplay elements like weapon charge-ups.
The InterpCurve types and evaluation functions can be found on Object.uc. There are several types that can be evaluted: Float, Vector2Dand Vector.
To create an InterpCurve, define a variable of type InterpCurveFloat (or InterpCurveVector/InterpCurveVector2D)
var InterpCurveFloat TextAlphaInterpCurve;
The curve values get populated in default properties with an array of Points – set of InVals and OutVals. In this example, my goal is setting the Alpha of an object, gradually going from 0 to 255 over a period of 1 second. Charting these in an application like Excel help produce better results for your curve.
We can then declare this Curve as such:
TextAlphaInterpCurve=(Points=((InVal=0.0,OutVal=0.0),(InVal=0.1.0,OutVal=10.0),(InVal=0.2,OutVal=30.0),(InVal=0.5,OutVal=80.0),(InVal=0.75,OutVal=120.0),(InVal=0.1,OutVal=255.0)))
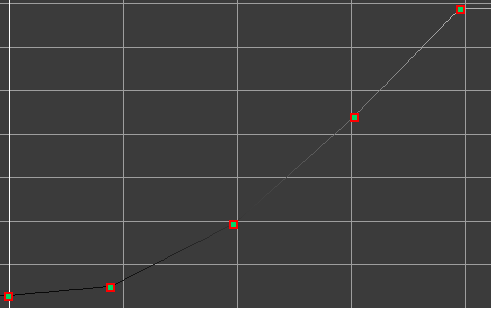
This curve would look something roughly like this:

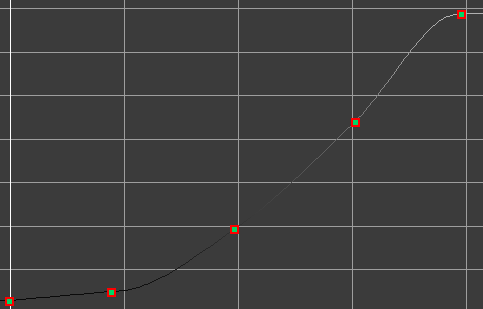
If we wanted to smooth this curve out, we could also apply a CurveMode to it. CurveModes will control the method each point uses to reach the next point. By default, CIM_Linear is used. The simplest one to use is CIM_CurveAuto, which will automatically attempt to determine the best curve. Applying CIM_CurveAuto to each point results in a graph like this:

To use this curve mode is simply an additional property on each point. Our TextAlphaInterpCurve will look like this:
TextAlphaInterpCurve=(Points=((InVal=0.0,OutVal=0.0,InterpMode=CIM_CurveAuto),(InVal=0.1.0,OutVal=10.0,InterpMode=CIM_CurveAuto),(InVal=0.2,OutVal=30.0,InterpMode=CIM_CurveAuto),(InVal=0.5,OutVal=80.0,InterpMode=CIM_CurveAuto),(InVal=0.75,OutVal=120.0,InterpMode=CIM_CurveAuto),(InVal=0.1,OutVal=255.0,InterpMode=CIM_CurveAuto)))
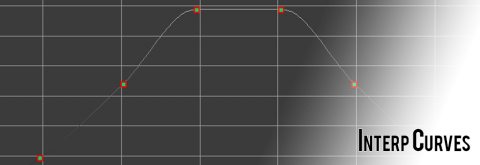
For additional customization, you can also modify the arrive and leave tangents for each point. These are done throught the ArriveTangent and LeaveTangent property of each point, and only apply when using the CIM_CurveUser curve mode. You can open up the CurveEditor in Cascade and have a look at the implications of setting tangents in curves.
To evaluate this curve, we use the function EvalInterpCurveFloat as such:
float AlphaLevel;
AlphaLevel = EvalInterpCurveFloat( TextAlphaInterpCurve, Time );
where Time is the time between 0 and 1 second that we want to evaluate for. At 0.1 seconds, this would return 10.
That’s all there is for Interp Curves! You can apply similar structure for Vectors and Vector2Ds – just substitute the appropriate type for OutVal.

